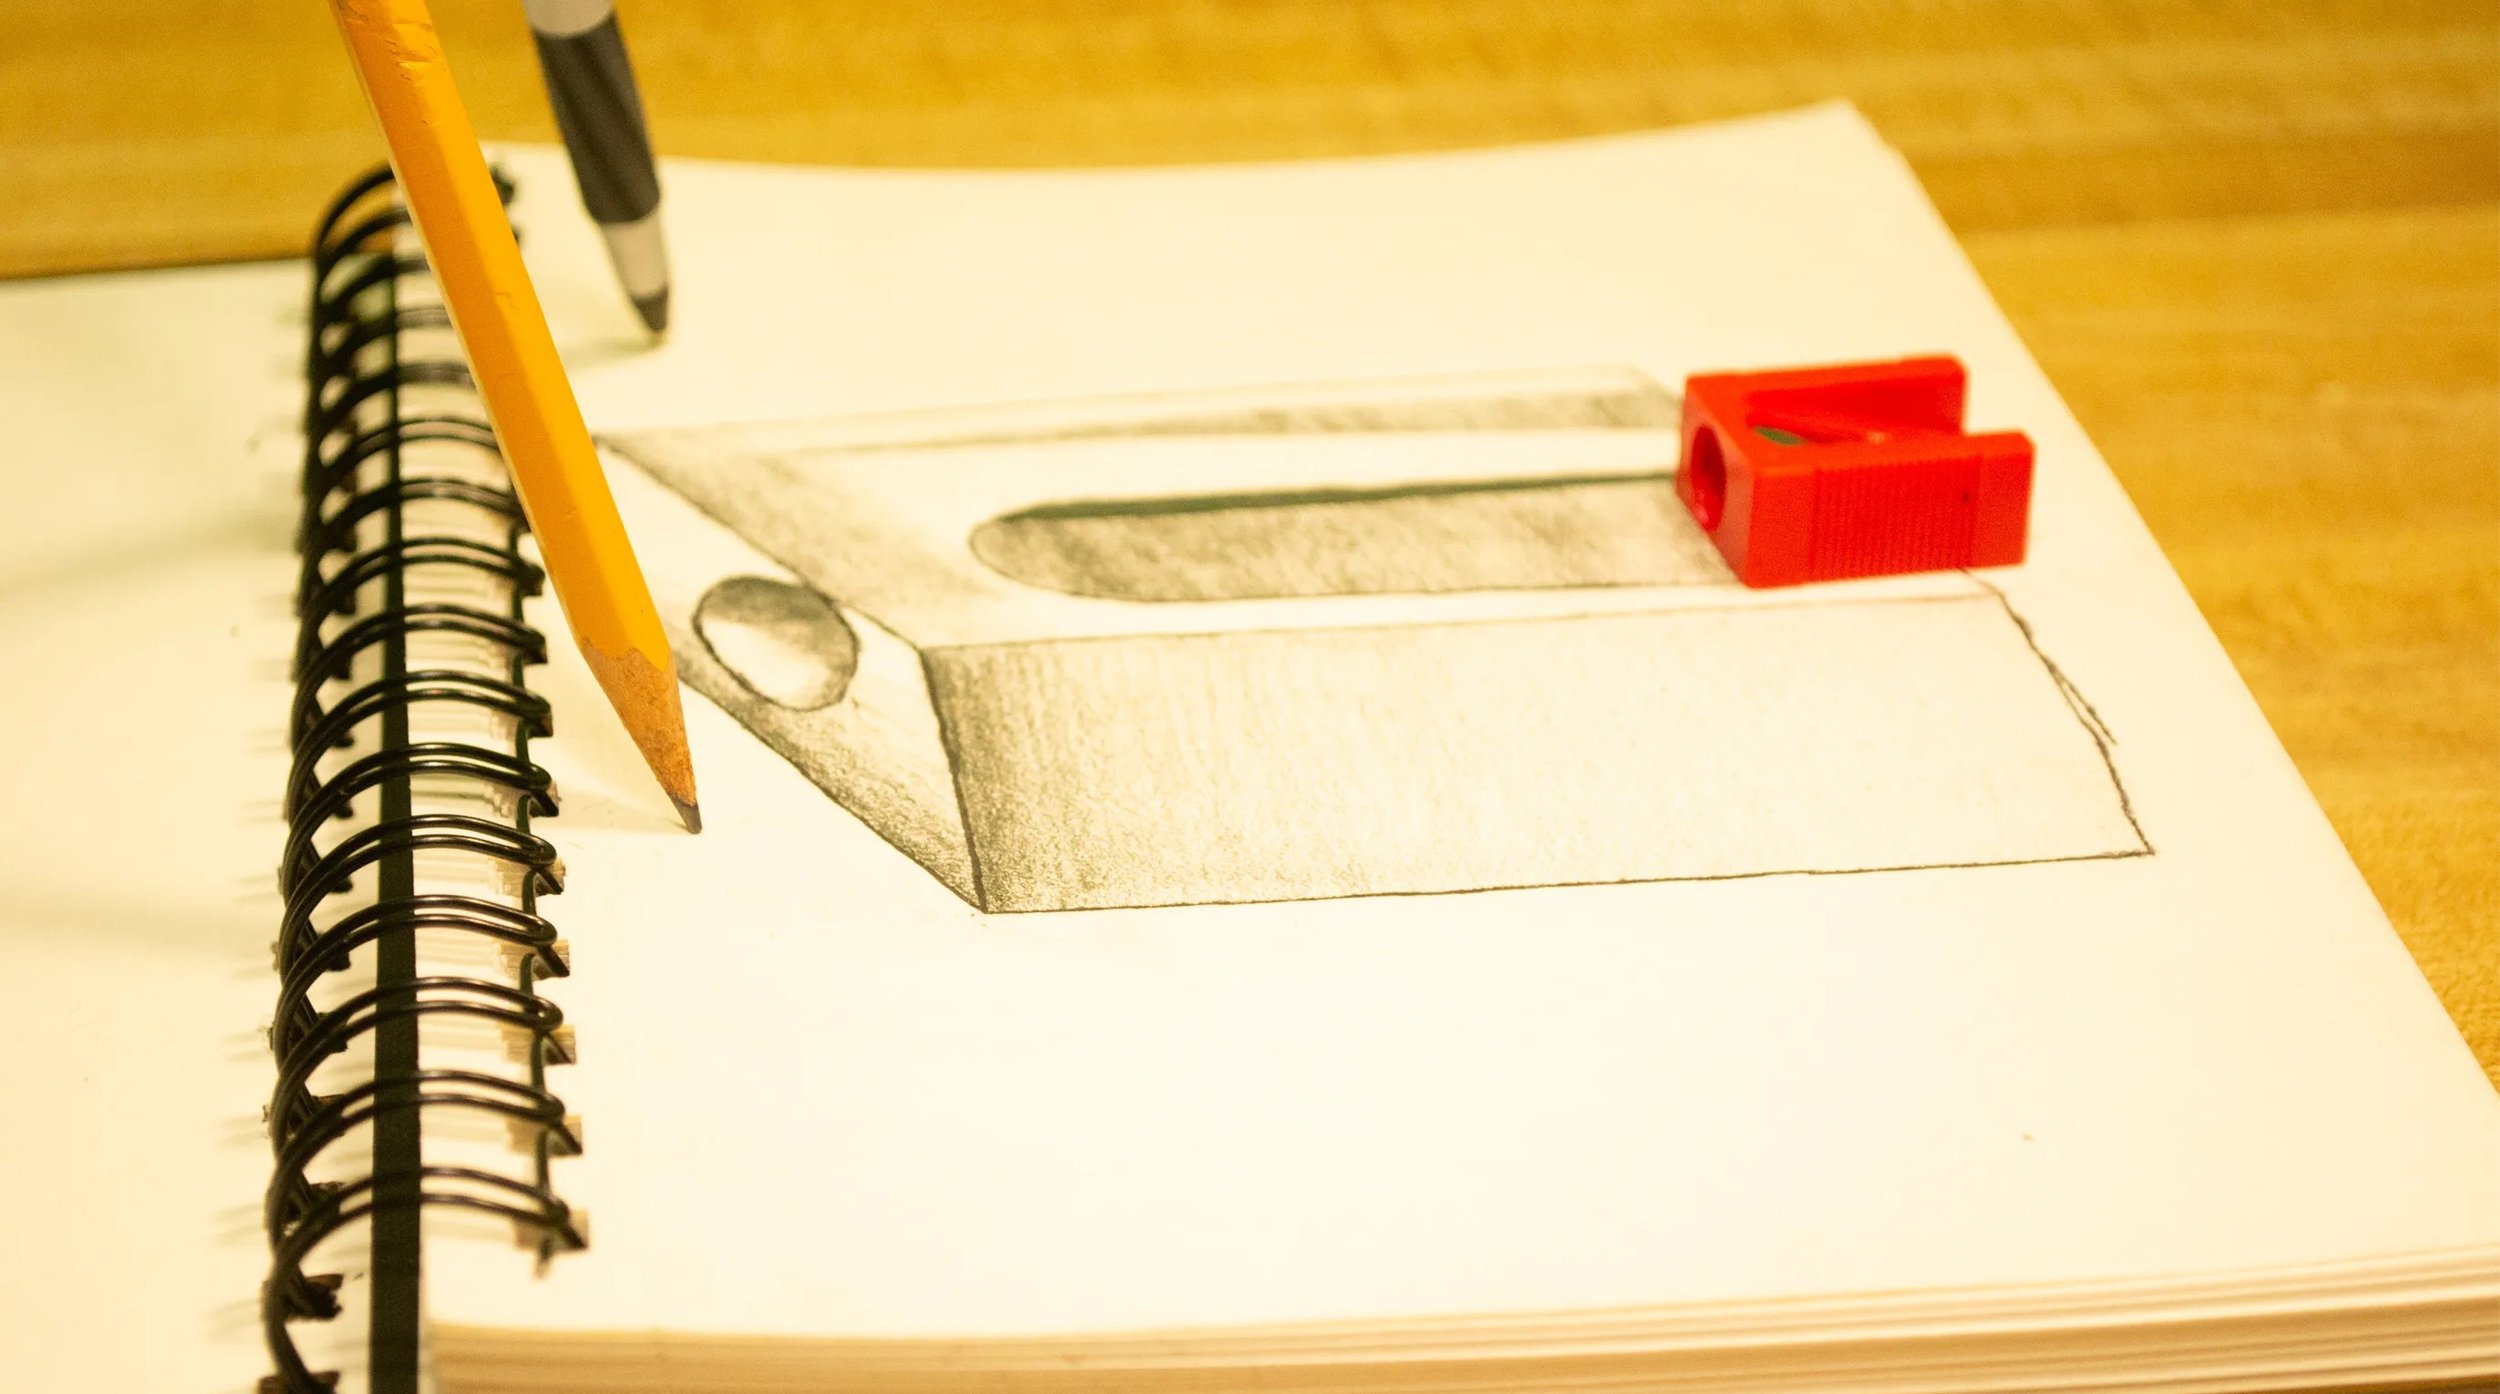
Pencil Pusher
As an artist, not having the right tools is inconvenient and frustrating. Sometimes being resourceful is the most creative ingredient to making art. I started developing a short stop motion animation about a pencil who wants to draw but doesn’t have paper. Pencil decides to open a sketchbook, but the sketchbook is too heavy for him. Pencil’s friends, pen and pencil sharpener, will team up to help him open the sketchbook and draw.
The best part about storytelling is choosing how the story unfolds: will it be chronological or a sequence of puzzle pieces leading to the big reveal? It could be overdramatic, lighthearted, or gut-wrenching.
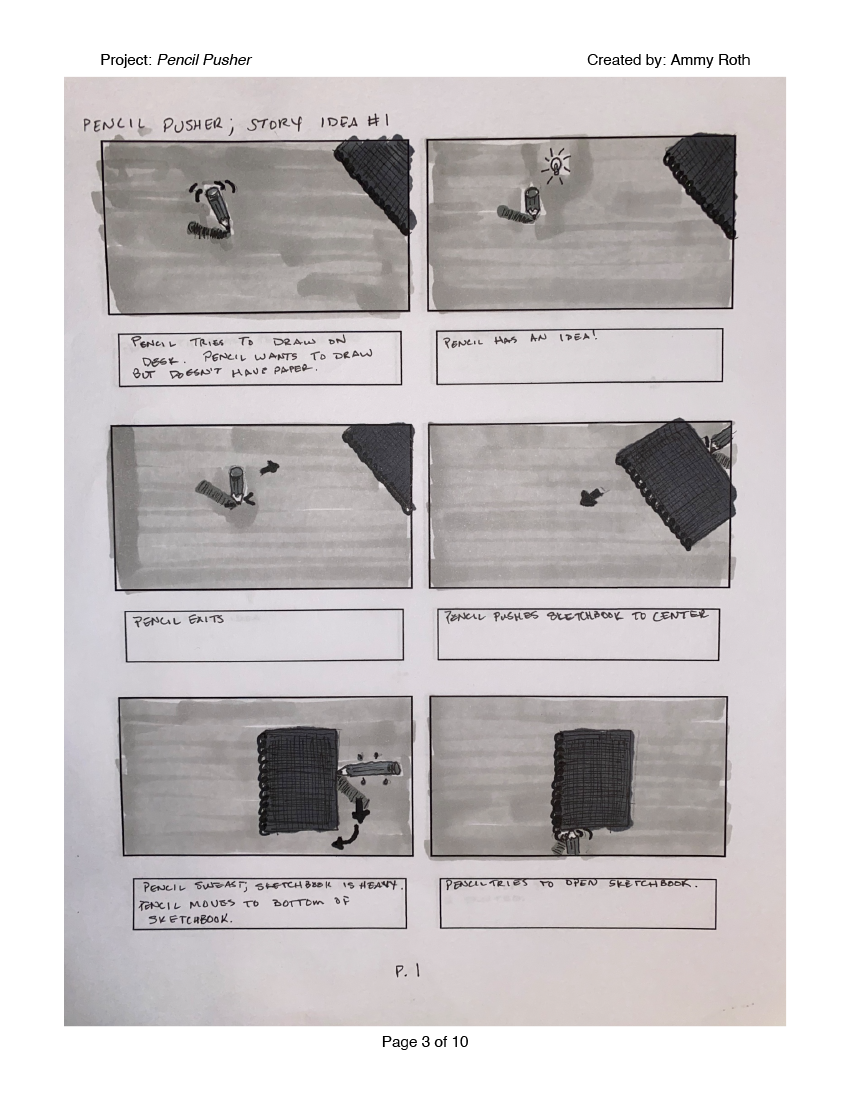
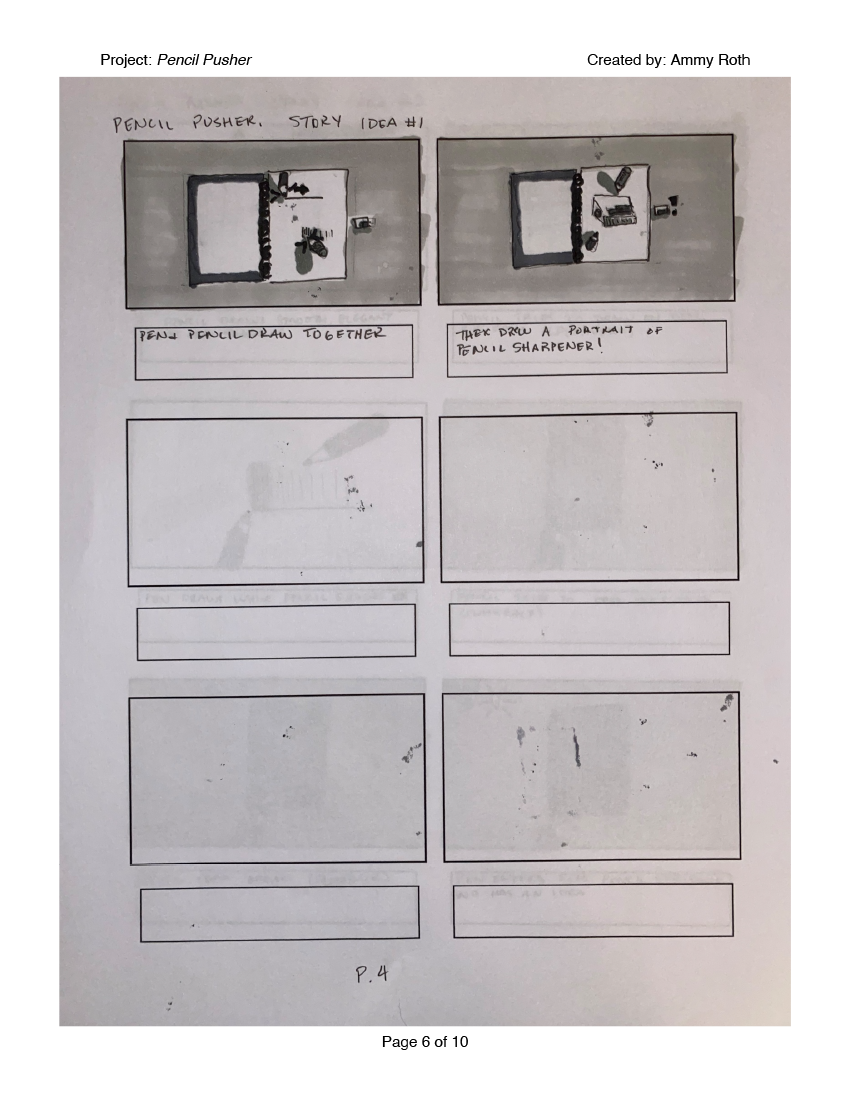
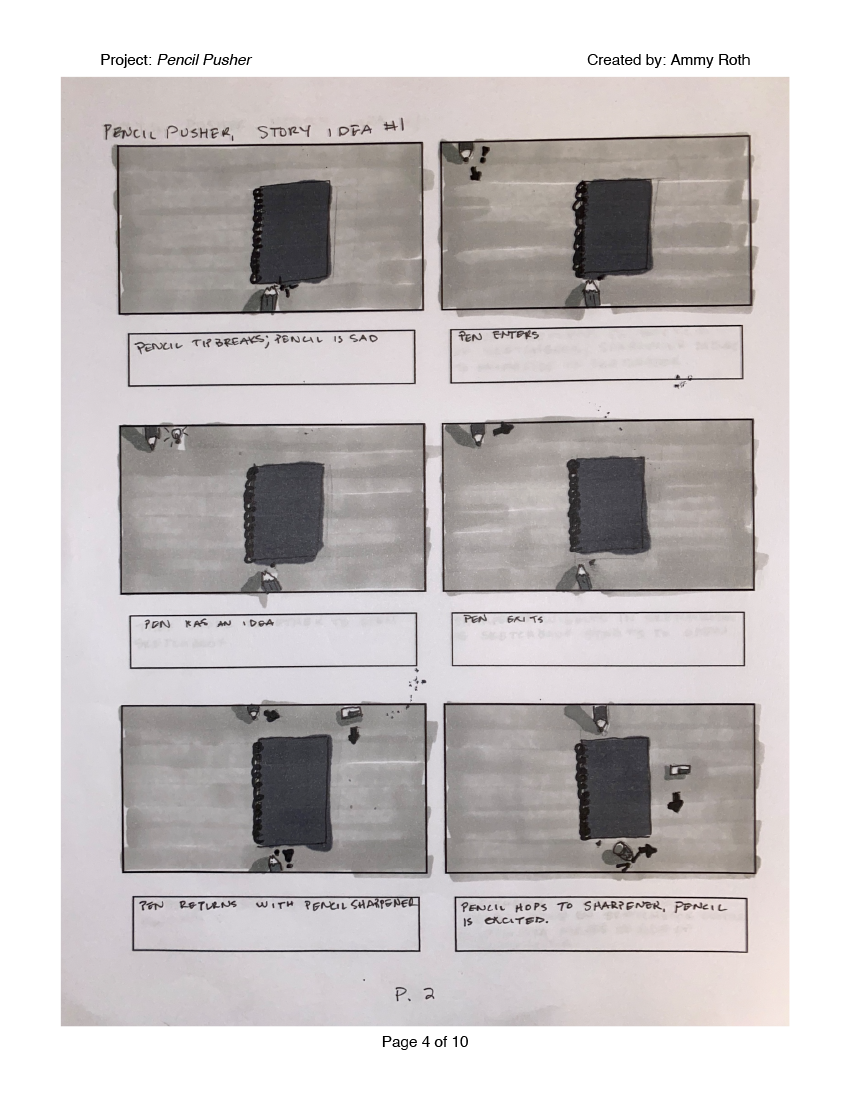
Pre-Production
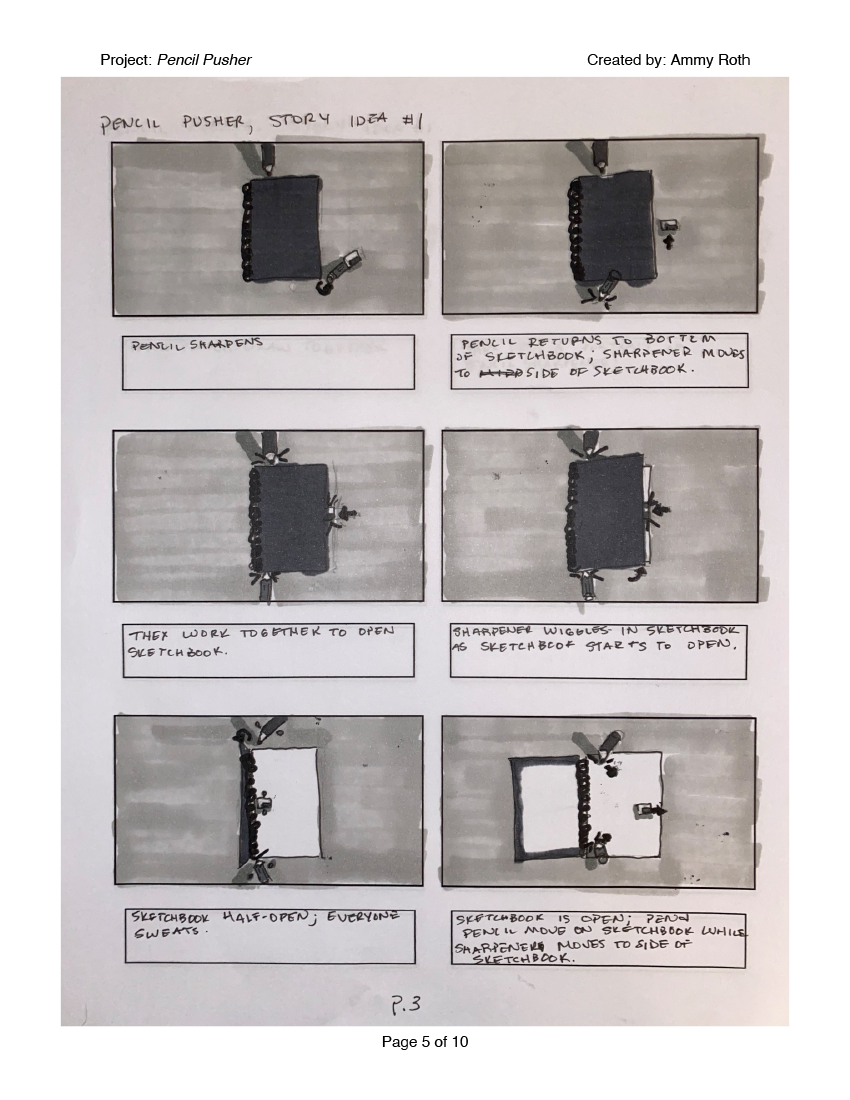
Before I started filming, I made sure I had all of my characters: a pencil, pen, pencil sharpener, and sketchbook. Then, once those were gathered and ready, I planned out the stage and how to make the characters move around the stage (after all, my characters are inanimate objects):
I wanted a desk reminiscent of elementary school desks. I happened to have old kitchen counters that are butcher block-style laminate pieces.
I compiled scrap wood from the garage and an old metal shelf piece to make a grid above the stage. The grid allowed me to manipulate the characters with ease.
I used another piece of scrap wood to hold my green screen (green muslin from Walmart for a prior project) on the rear of the grid so it would fall behind the stage.
With electrical wire, I attached my characters to the grid as puppets. The wire wrapped around the pen and pencil to hold them up while giving me the liberty to shift them around. Shortly into shooting, I changed these wires for a rope tied with a running knot. The running knot allowed me to raise and lower my characters. With the wire hooked on the bowl of the running knot, I could still change the positioning of each character.
Lights
In theatre, we like to say, “without lights, this is just a radio show.” So, I gathered enough lamps to sufficiently light up my stage area. I chose to set everything in the garage because the garage has minimal natural light; thus, I can control every light source in my work area. I used a total of three lamps and the overhead garage light: one for each side and a third for an overhead center, attached to the grid.
Camera
For my camera, I used my trusty Nikon d3100, Sadie. Before shooting, I ensured all of Sadie’s batteries were fully charged and my memory card had total storage capacity available. Next, I set Sadie atop a tripod and attached a remote shutter release to reduce the risk of shifting the viewpoint. Later, I added an adjacent tripod to film a time-lapse video with my phone.
Action!
When I began shooting with my characters attached to the wires, I discovered it was challenging to raise them. So, I added a rope tied with a running knot to the middle. I kept the wires attached to the characters and hooked over the grid for ease of use. The new setup allowed me to adjust the characters with the wire and lift them with the rope.
Then, I shifted each character slightly for each frame, following my storyboard. After two hours, I captured 580 frames and nearly reached the pencil sharpening scene. However, I left each piece exactly where it was and returned to it the following day. From 9 a.m. to 1 p.m., I finished the pencil sharpening scenes and captured about 300 more frames. After 3:30 p.m., I finished the drawing sequence in the final scene. The shooting process took about nine hours, six of which I used on the drawing sequence, totaling 1065 frames.
I transferred the images from my SD card to a new folder for “Pencil Pusher.” Then, I organized these images into a single sequence using Adobe Lightroom since the raw files jumped number sequences. After the photos were loaded into their new folder, I imported them into Adobe PremierePro as an image sequence. Once the image sequence loaded, I created a rough audio score of the sound effects I would add and where. Then, I returned to my makeshift stage and recorded the sound effects needed for on-screen actions. In addition, I recorded the vocals for characters and downloaded a ding effect for the lightbulb animations. Then, with Photoshop, I added the lightbulb effects in a video layer and imported the effect to PremierePro. I did have some difficulties with creating an ultra key for the green wires, but I do have some ideas and will update you soon.

